Form and Postal Utilities Postage Reporting Tools makes managing ones’ postage meters, accounts and addresses simple while giving a myriad of detailed information and reports for all your postage data.
 This will take you back to the Conntrol Panel page.
![]() The Help Button, clicking it will display useful information for the page you are currently on.
The Help Button, clicking it will display useful information for the page you are currently on.
 Clicking the Cog will take you to your personal account page. Which is where you can change your personal settings.
 The Star lets you make shortcuts to the page you are currently on, it is also where you access previously made shortcuts.
 This is the Log Out Button, it will exit you out of the account you are currently logged on as.
This is the Personal Accounts Page its where you change your accounts settings.
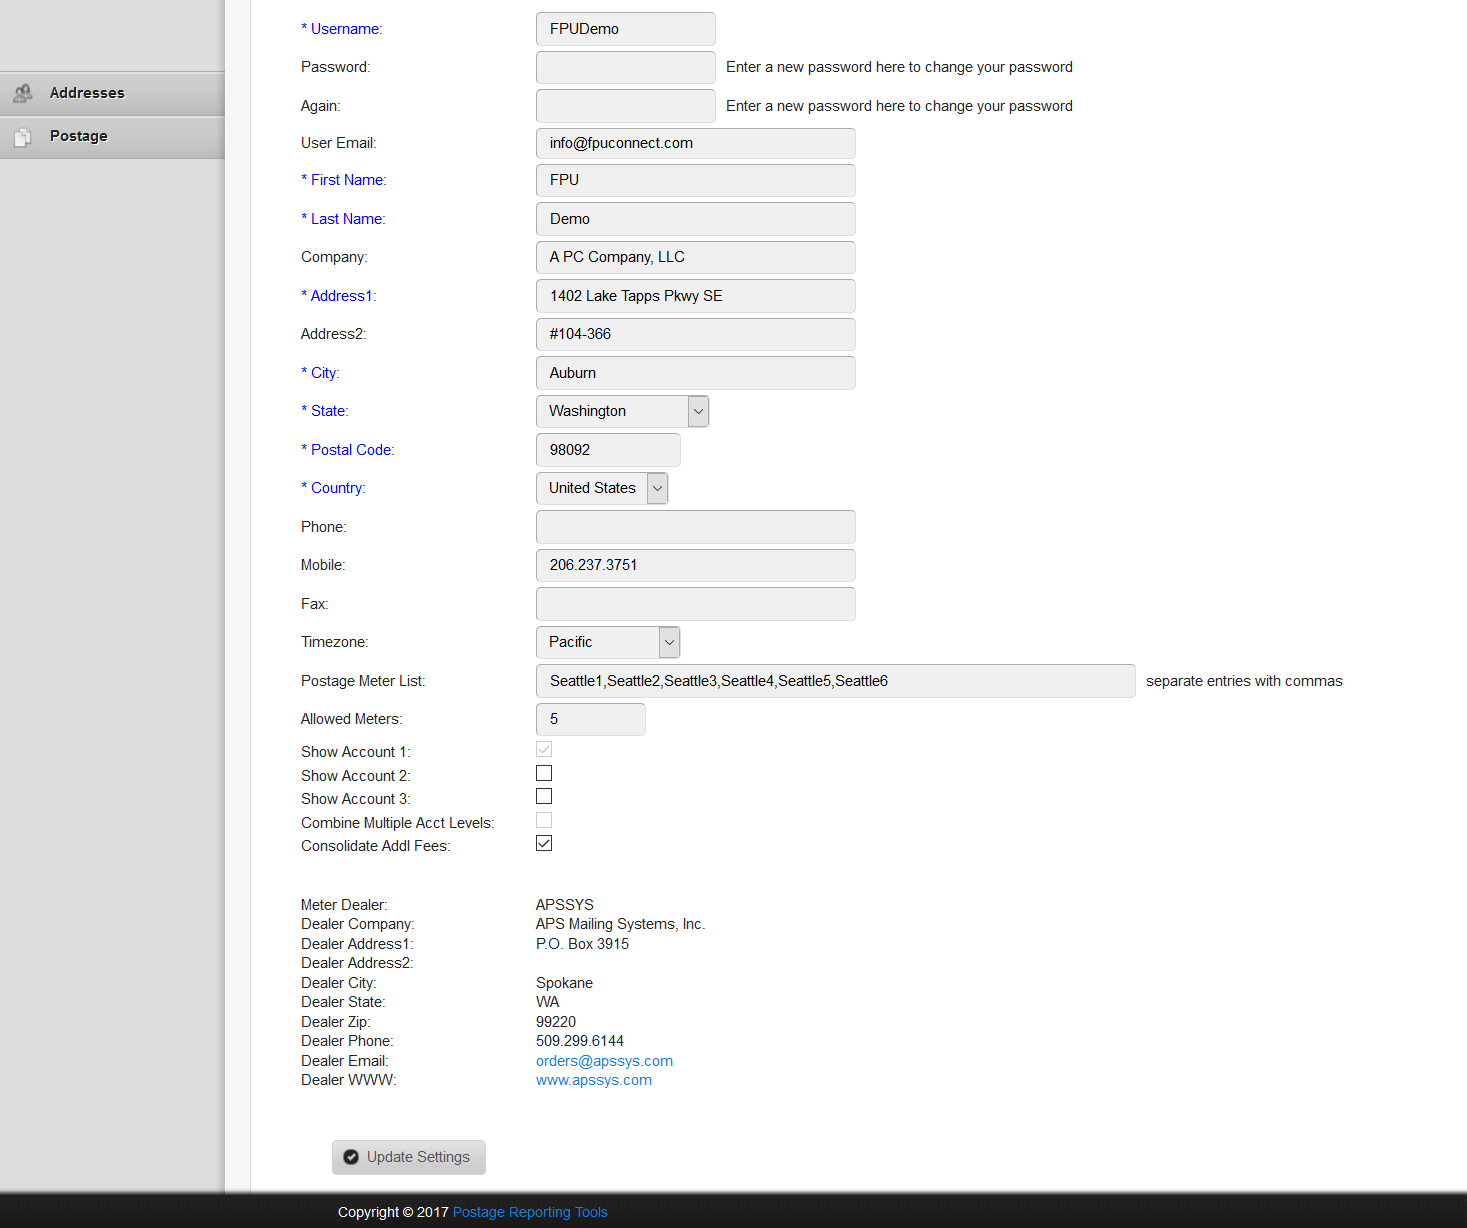
The blue categories with an asterisks must be filled in.
The default package allows up to five meters, and three account levels.
If multiple accounts are selected it is possible to combine them across account levels by clicking the “Combine Multiple Acct Levels:” button.
This is useful when you want to mail several different parcels to the same location but not necessarily the same person.
The “Consolidate Addl Fees:” button toggles whether you would like to view the additional columns for tracking accounting and handling fees.
The Address Details page, shown below, is where you can see all of the addresses for your accounts.
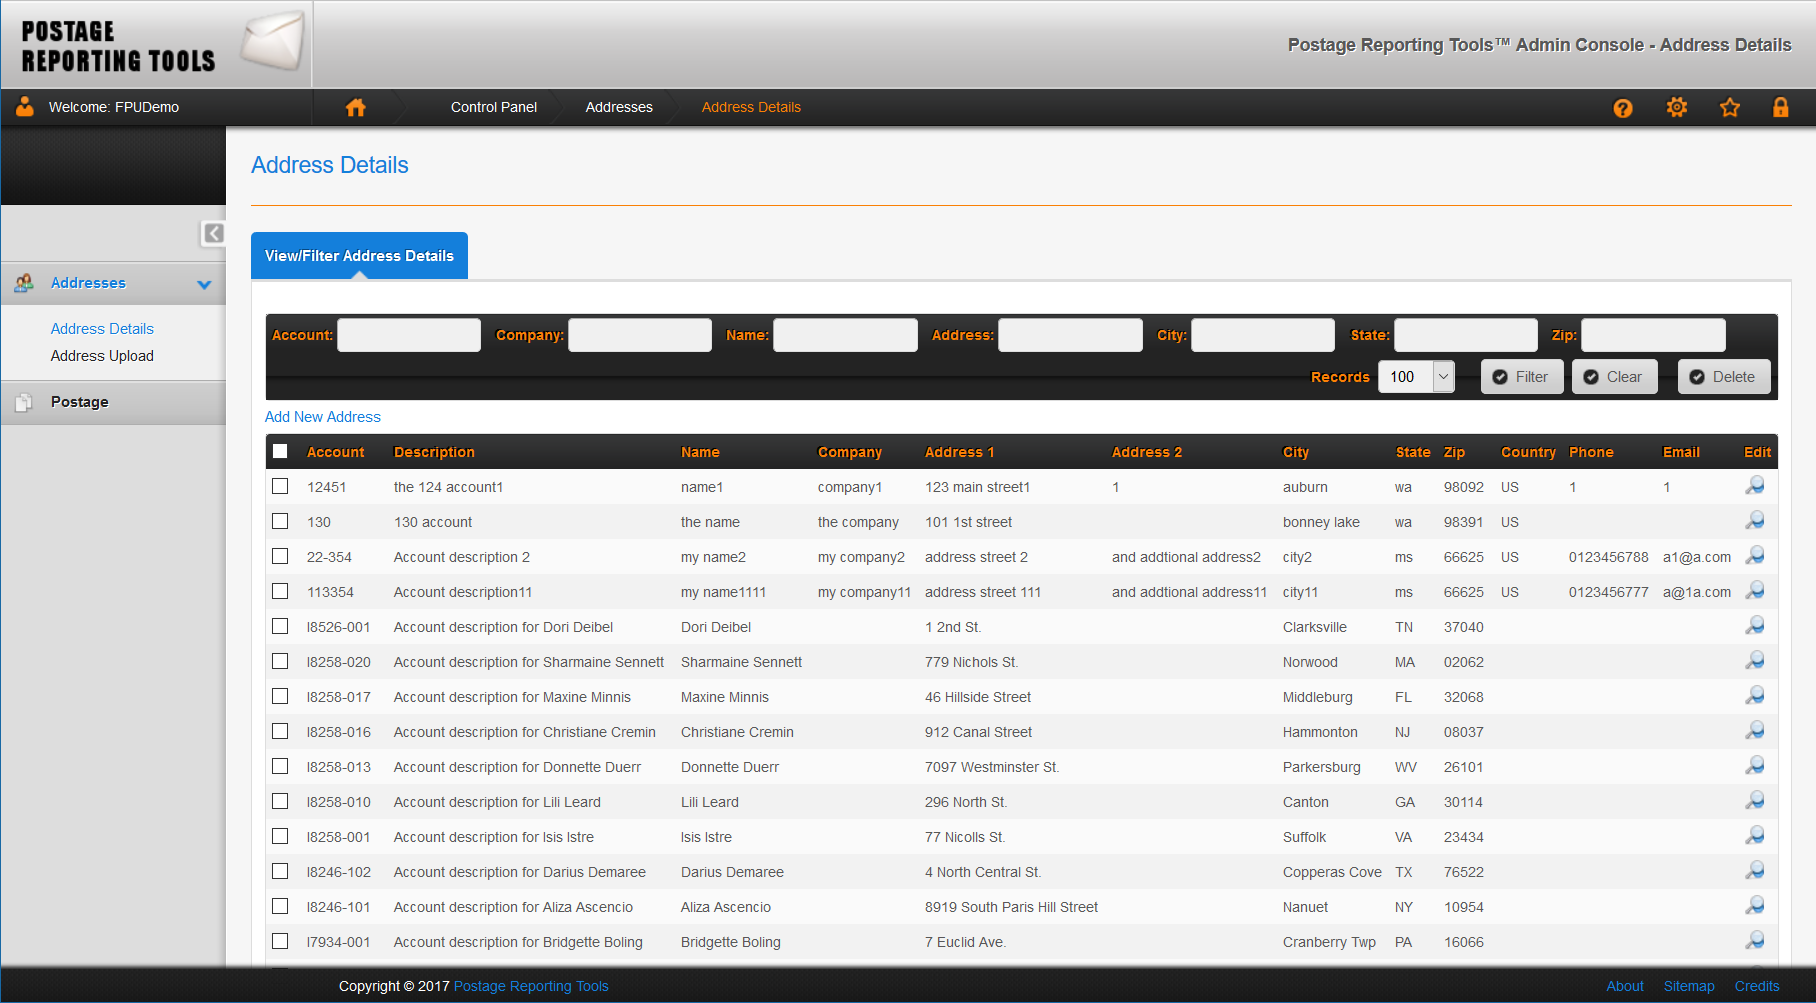
The address details page is where you will manage your address list.
Addresses are linked to postage via the accounts number.
Company, Name, Address, City, State, and Zip, are all different Filter Fields. Fill in some or all of your criteria and press the Filter button to view results.
Pressing the Clear button will reset the filters back to default.
Records can be deleted by selecting the box in the left column, or by clicking the checkbox at the top to select/unselect all of the displayed records, then pressing the Delete button to delete the checked records
Use Add New Address link to add customers. The magnifying glass icon lets you edit an existing record.
This is the Address Edit page. Accessed through either the magnifying glass icon, or the Add new Address link.
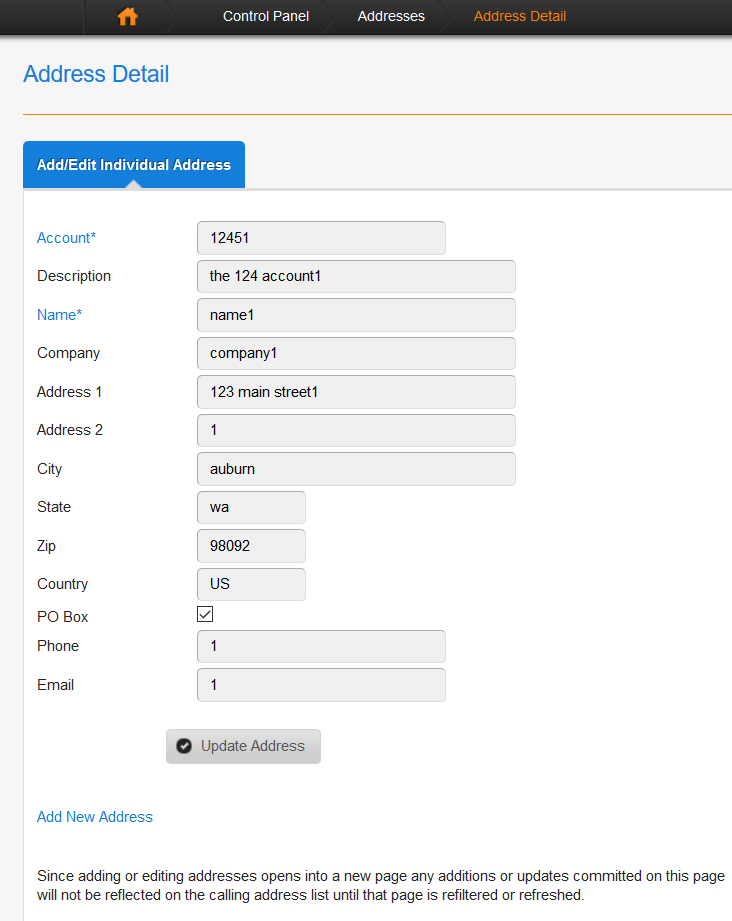
Since adding or editing addresses open into a new page, any additions or updates will not be reflected on the calling address list until that page has been refreshed or refiltered.
Address Uploading through the page pictured below.
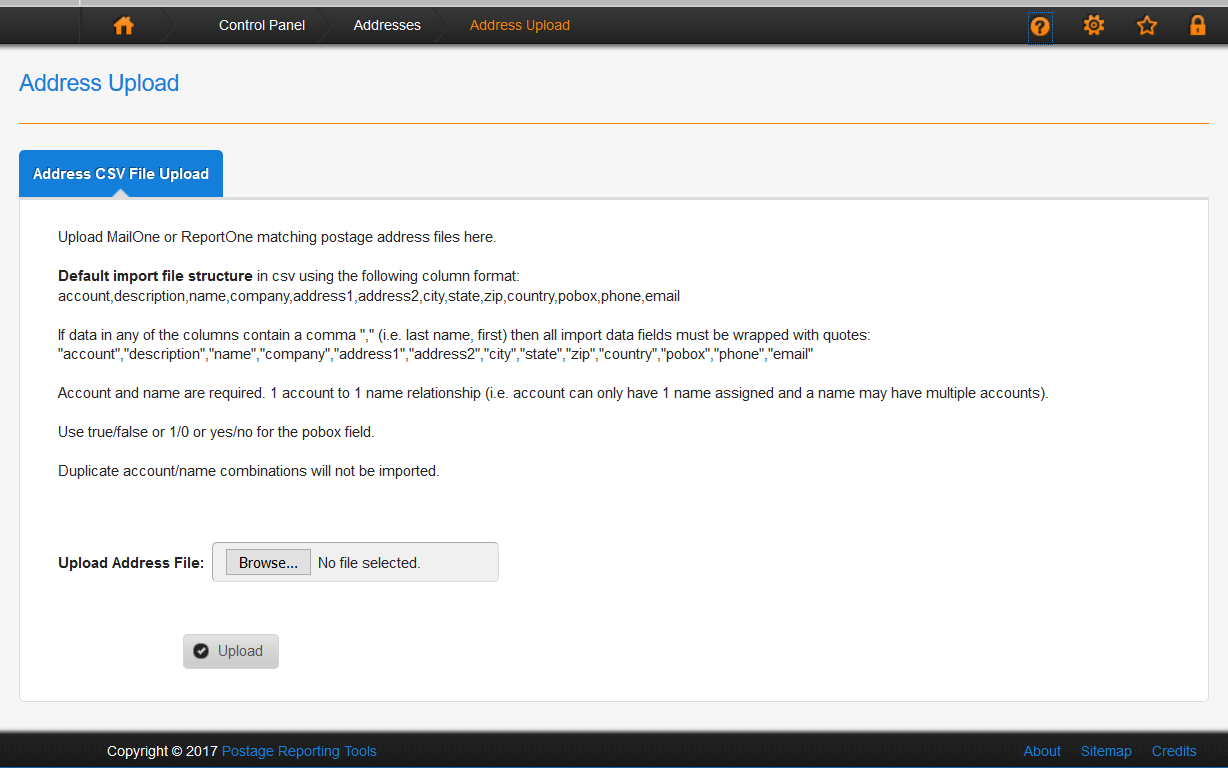
This is there you will upload your MailOne or ReportOne matching postage address files. Click the Browse button to search for your file address import file, then press the Upload button. Uploaded files default file structure is csv.
If data in any of the columns contain a comma “,” (i.e. last name, first) then all of the imported data fields must be wrapped within quotes.
There is a one to one account to name relationship (i.e. account can only have one name assigned and a name may have multiple accounts).
Duplicate account/name combinations will not be imported.
The Postage Details page, shown below, is very similar to the Address Details page.

The Postage Details page shows the accounts and postage costs for each transaction.
The list shows the hundred newest postage records by default.
Meter, Account, Date, Class, and Extra Services, are all different Filter Fields. Fill in some or all of your criteria and press the Filter button to view results.
Pressing the Clear button will reset the filters back to default.
Records can be deleted by selecting the box in the left column, or by clicking the checkbox at the top to select/unselect all of the displayed records, then pressing the Delete button to delete the checked records
Pressing the CSV button displayes the data in CSV format in a text box for ease of copy/pasting.
Pressing the CSV File button will provide a downloadable file for your data in CSV format.
Your cost totals are displayed at the bottom of the page.
Postage Reports is where you will make all your reports in an easy print friendly format.
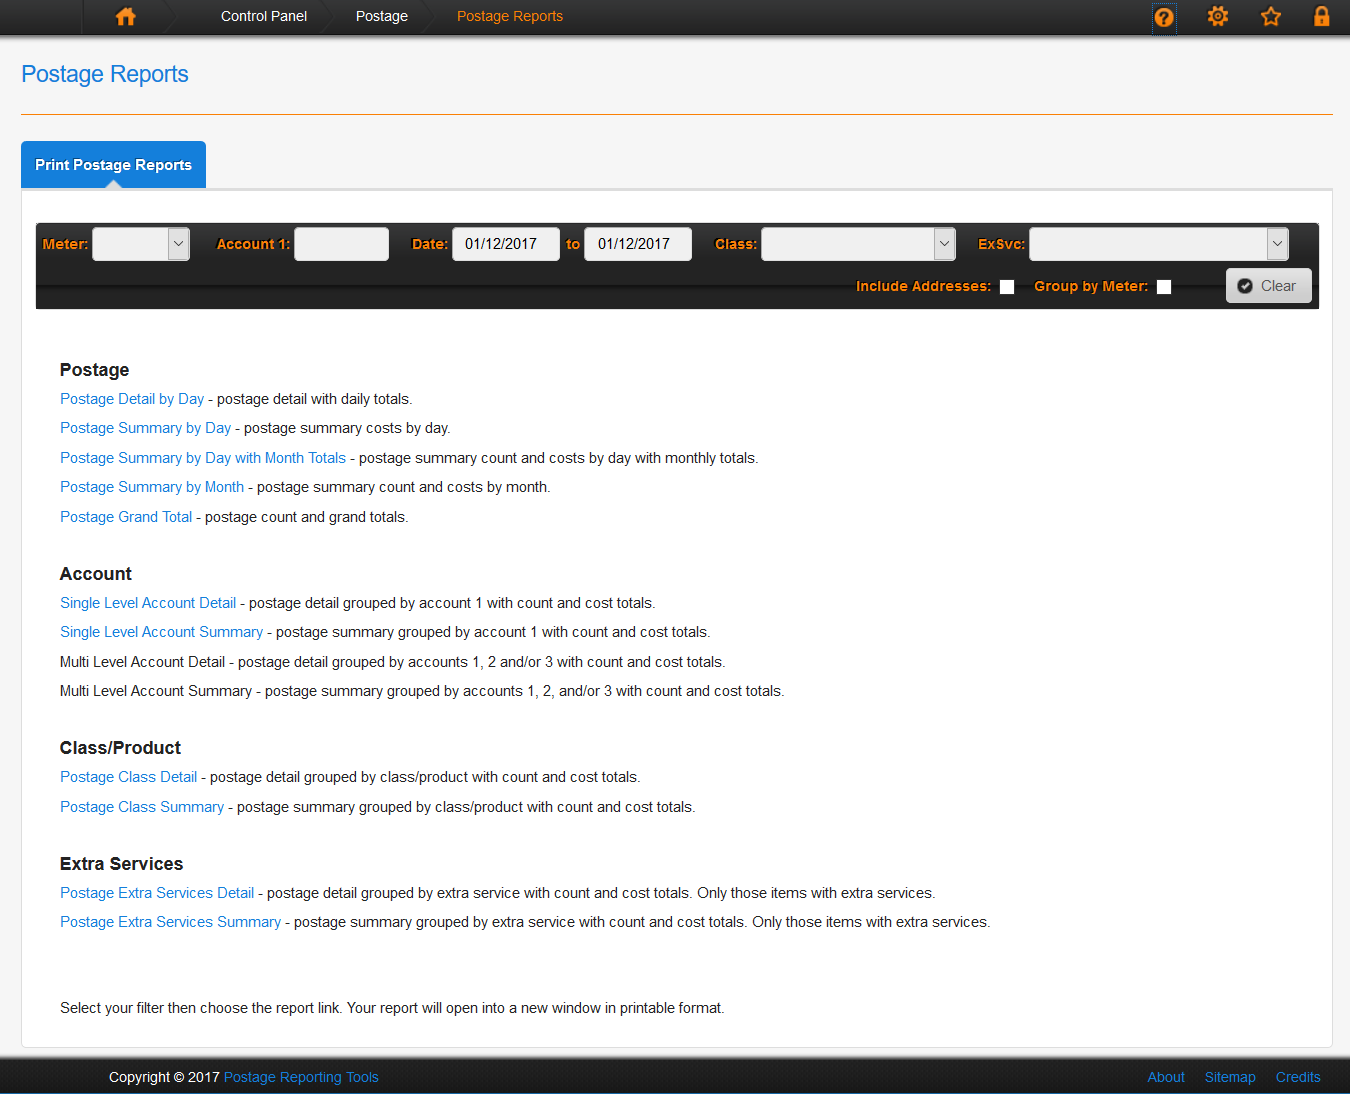
Like the Address and Postage Details pages your filter fields are along the top.
Note the two check boxes along the top as well, Include Addresses will add addresses into the report if checked, and Group by Meter will have the reports data grouped by meter.
The clear button resets back to default.
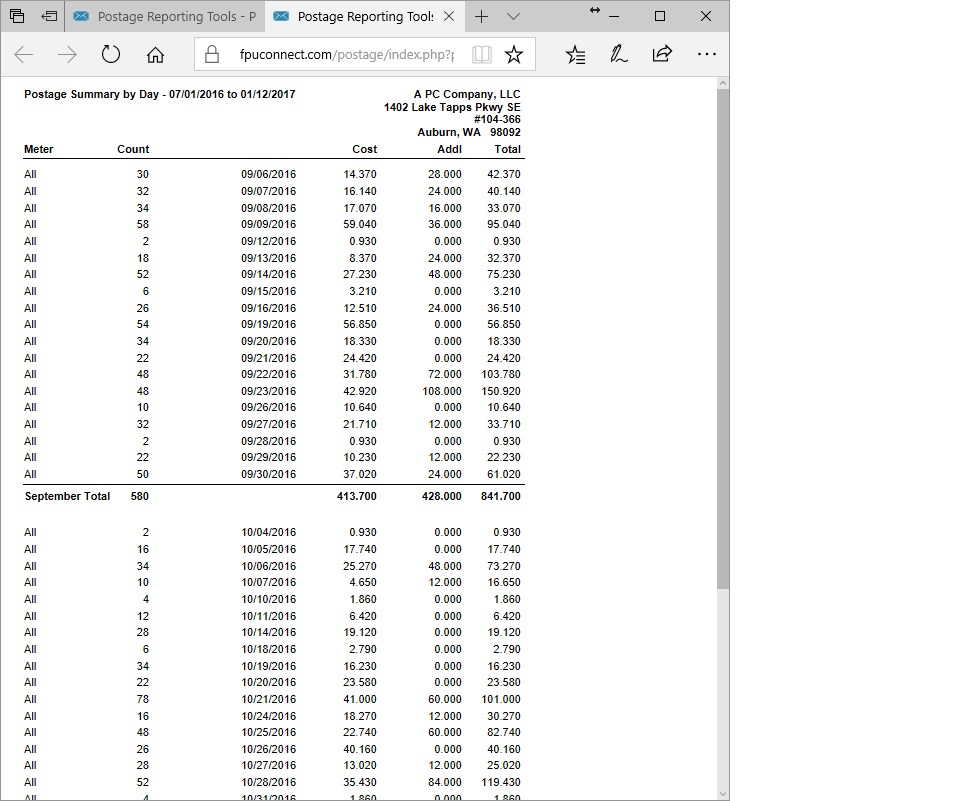
Example report layout.
The Postage Upload page lets you upload your MailOne or ReportOne postage transaction export files.
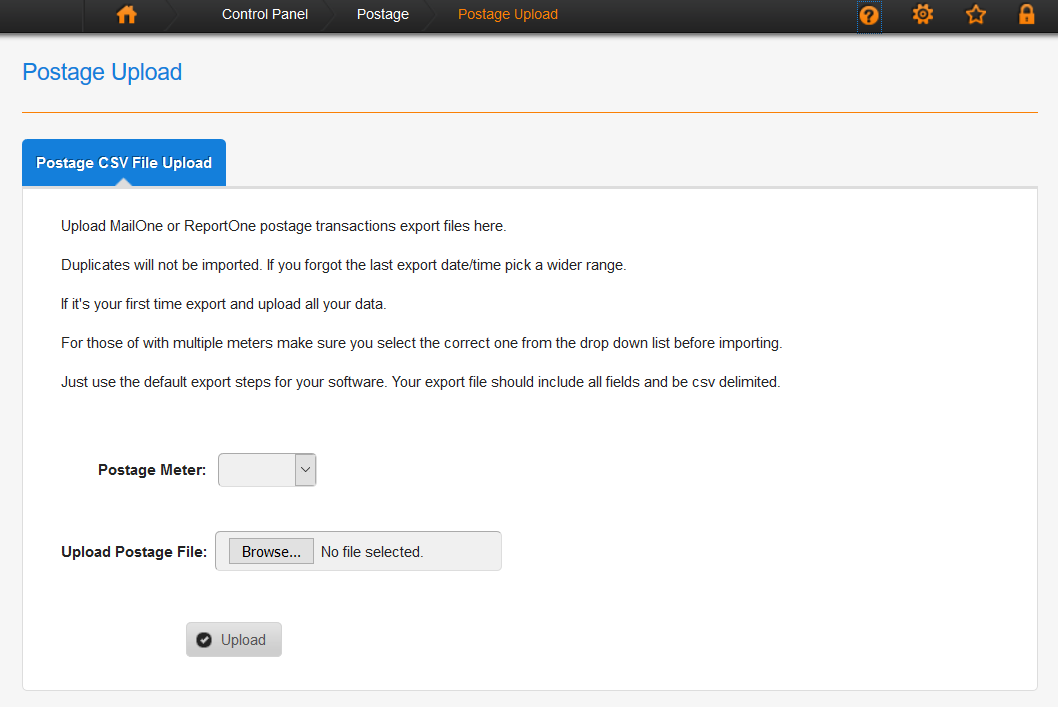
Simply use the default export steps for your software. Make sure that the export file includes all fields and is csv delimited.
If it is your first time, export and upload all of your data. You don’t need to worry about any duplicates (meter-postage record) they will not be imported.
Use the Postage Meter drop down list to select your meter then use the Browse button to find and select your postage export file. Lastly, click the Upload button.
If you need to modify the meter drop down list, you will need to go to your customer profile settings (the Cog) and edit the Postage Meter List.
[insert_php]
echo date(“m/d/y”) . “
” ;
echo date(“h:ia”) ;
[/insert_php]